Monday 28 November 2011

quality goes a long way

I have no doubt dear blog readers that you have a good appreciation of quality, probably far more so that the average person in the street for whom quantity seems more important. Does quality have to cost though? Are we just the fortunate few to enjoy quality? A few weeks ago I had to say goodbye to this pair of shoes. 
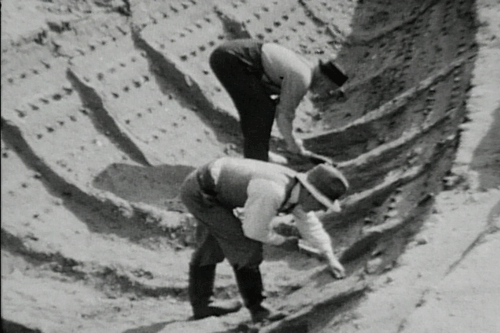
They were made for me about ten years ago by Jeremy Atkinson  and as you can see they have had a hard life but served me well. Normally bespoke footwear is very expensive. Even a pair of off the shelf Church's cost £300-£400. A pair of proper bespoke shoes by John Lobb will set you back £3000.  If you can find a good shoemaker with low overheads and buy direct however you can get quality bespoke shoes that cost less per year than cheap Chinese shoes. When I helped judge the Balvenie masters of craft awards last year Ruth Emily Davy a young shoemaker in Wales was one of our winners, her shoes are around £300, now if you get 10 years out of them that is better than £30 a year on cheap shoes going into landfill.

My shoes from Jeremy were less than half that price yet the quality is superb. The leather is thick and supple like the best saddle leather, it comes from Clayton's tannery at Chesterfield. They fit, like a glove? er well like a shoe? or well like a shoe should do if it's been made exactly to fit your foot. There is no doubt over the ten years my previous pair lasted, and I am very very hard on my footwear, that these were far better value than buying a new pair of cheap shoes each year.


These two pairs are the only shoes just like this Jeremy has ever made, they are basically a clog upper on a shoe sole. I love my welsh slipper clogs and particularly this clever little clasp which allows you to slip the shoes on and walk away or clip them up tight with a flick of the finger. He does more normal shoes with lace ups as well and wonderful clogsl Now just before you click off to check his website be warned it can take a while to buy from him, you need to be persistent.

Now I have been blogging for a couple of years and really value the support and feedback I get in comments posted, people mentioning they read when we meet and nice emails. If you were here I would offer you a drink. To continue the theme of quality going a long way it would probably be a drop of Balvenie. I won this bottle of Balvenie 30 year old 2 years ago when I was Balvenie's "Artisan of the Year". It's not quite finished yet, I have made it last. It only comes out on special occasions and generally as part of a Balvenie tasting where we start with the £25 12yr old doublewood then have my favourite the 15yr old £40 single barrel and only then a little taste of the £300 30yr old. It may be extravagant but with whisky like this you only need a small amount to enjoy the flavours so there are maybe 70 good tasters in a bottle. Compared to a bottle of wine from which you get 4 glasses my £300 bottle equates to £4 a taste or a £16 bottle of wine which probably is no where near as special. Now what you are asking is that strange small sample beside the 30yr old?


let me pop the lid and let you sniff....pretty special yes? Careful don't spill it...

Well this one is pure indulgence of the John Lobb level, no way I can even try to justify this as being quality but really better value than cheap wine or shoes. No this is extravagant. Two weeks ago I had an invite to the launch of the Balvenie 40yr old at the V&A. It fell in the middle of a bowl carving course and I couldn't let my students down so I was gutted to have to decline. Thankfully those lovely folk at the Balvenie sent me this 10ml taster in the post. How special? Well there are only 150 bottles available worldwide with only 18 allocated to the UK 2 of which they drank at that launch at the V&A. At £2500 a bottle my tiny 10ml bottle works out about £35. I'm saving this one and just sniffing it occasionally at the moment. I'll probably share a tiny taste with my dad over Christmas.

Wednesday 16 November 2011

building the world's most iconic viking ship, part 5

This post will mostly be pictures, some of the replica, some of the original Oseberg ship. The last post left a board steamed, bent fitted and riveted or klinked on to the hull. As the hull takes shape each point is measured and set to ±5mm. It can be adjusted slightly by pressing up from underneath with props or by adding heavy rocks inside. These rocks look randomly scattered but they are very precisely placed to get exactly the right shape into the hull. Once it is dried and the ribs fitted the shape will be set.


And what a shape it is too, such sweet lines.

One of the iconic features fo the Oseberg ship are the carvings. These are some close ups of the original taken in the Viking ship museum in Oslo in 2004.


and some images showing the replica

building the world's most iconic viking ship, part 4

Ships built with overlapping planks like Viking ships are called "lapstrake" in the USA, in the UK we call them "clinker built". I had never known why until I hammered home one of the rivets that is the key to this construction and asked what it's name was in Norwegian, it's called a klink and the verb klinking fits perfectly as you'll see from the video at the end of this post.

These are the tools for the job, a fairly small cross pein hammer, a copy of a 9th century one of course, a rose head boat nail  and a rove, that's the square washer which fits tightly over the nail head and when driven down on to it grips hard.

So now the finished dressed board is clamped in place for the final time and holes drilled through the 1" overlap  with the board below. The nail is driven up through the hole and the rove driven down on top using the hammer with the hole in it to push the rove down tight. It's a noisy job if you are doing it all day so here Jan is wearing a mix of Viking clothing and ear defenders. You can also see in this picture the scarf joint where two planks join end to end. This is a simple chamfer, the joint is sealed with woolen cloth and pine tar and two klinks will go through the scarf to hold it tight.


Now the end of the klink needs to be cut off this is a 2 person job with sharp cold chisels.


and finally we get to the klinking first a photo, this is where the end of the klink is hammered in such a way as to spread it out into a sort of dome that holds the rove very tightly in place. First you tap with the cross pein to spread the klink and then flip the hammer over and go round and round the outside to dome it nicely.

 When it's done it looks like this. This is one of mine and goes through a scarf joint.


That's my klink, it really is a great feeling to be a small part of this project and to know there is some of my work in the final ship. As the timber in the ship dries it will shrink slightly and all these klinks will need hammering again to tighten them up, I don't know just how many there are but it must run into several thousand and no one is looking forward to that job.


and now a little video clip of klinking


In the UK with our often acidic soil conditions when we do find old clinker built ships the klinks are often the only thing to survive when all the wood has been dissolved away. That was the case at our most famous ship burial Sutton Hoo  this image shows the klinks or rivets in place and the outline of the boat in the sand but all the wood was gone.

The same is true for the ship found recently in Scotland, the only Viking age ship burial so far found on the UK mainland. It will be interesting to learn more of that find as it is excavated.

Just a couple more posts to come now showing all the replica Viking tools, and some more shots of the boat and it's fantastic carvings.

building the world's most iconic viking ship, part 3

So in our next installment in Viking boatbuilding we take the planks that were previously cleft, rough hewn and planed and trial fit them to the boat. Each and every board is different and is an exact replica of a particular board on the original ship. This is the office with the masterplan and to the left you can see scaled versions of each plank.


These are then turned into full scale plans which are taken out to the rough planks, drawn around and the profile cut out. This is Jan finishing  a plank before trial fitting for the first time. Most planks have raised sections which will be used later for lashing the ribs to.


Next we take these simple but very effective clamps
and trial fit the board in place.

Working along the plank I bend it to shape whilst Jan applies the powerful clamps, once the base of the board is clamped tightly we can twist the outside edge to check it will take the correct shape. It is not so much a bend as a twist in each board that gives the boat it's shape. You can see here the clamp with the rope is pulling the bow end inwards and the stern end is pulled outwards and downwards giving about 15 degrees of twist on this board, it will get a little more later.

 We have two datum lines to check the shape against, a row of pins set into the keel and a taught wire stretched above the ship. Using these two as measuring points it is possible to triangulate out to set each board in precisely the right place, we worked to a tolerance of ±5mm. Once each board was in it's final place the props underneath were fixed holding it's position.


Once we were happy with the trial fitting and had done any final rough shaping the board went into the steamer for 1 hour 20 minutes. When it comes out you have about a minute during which it moves very easily and then a couple of minutes for fine adjustment so everything has to be planned and to hand and everything happens quickly.


By the time the plank Jan and I had been working on was ready in the steamer it was already dark, it starts going dark at 3.30pm we did have big floodlights to work under sorry about dodgy pic quality.

Here the plank is in place and Jan is just tweaking the final line, you can clearly see the twist with the two ends of the plank being maybe 20 degrees out of line. We took the top and bottom corners 10mm further than they will end up expecting them to relax slightly when the pressure is taken off.


Now the board stays in place overnight after which time it's shape is set, it can be removed and very precise fitting work done, planing the joint to that it fits without the slightest gap. Once that is done it's time to rivet it in place, and that riveting, the whole essence of clinker boat building, is the next post.


Tuesday 15 November 2011

building the world's most iconic viking ship, part 2

In part 1 we covered a little of the history of the Oseberg ship and the project to make a reconstruction and then cleft a large oak into 16 thin pie shaped wedges to make boards. The next stage is to hew these boards down from the pie shape into an even 1" thickness. There are various ways of holding the board whilst you do this, I like to have the surface I am working sloping away from me at an angle of around 30 degrees. I cut notches with the axe down to the marked line then hew off the chunks between. This particular replica Viking axe was my favourite and was a dream to use. It was remarkably similar in use to Japanese carpenters axes.

This axe was forged by a Danish smith, I think it is a thing of great beauty but not only that it's balance and edge holding were perfect too, it just worked like a dream.


and these are the axes I used in Japan last year, equally good and remarkably similar considering they are separated by 1200 years and half a world.

 Next step is to turn your plank over mark 1" thickness for the smaller boards 1 1/4 for the largest boards and hew away the excess. This is Gregorius at work with the ship in the background. The four legged things for resting boards on which we would call horses in Norway are known as pigs or swine, I thought it suited them well.

This rough hewing laves a coarse surface and now we raise the board up vertical so the axe can be used downwards across the face of the board and at a slight angle to get a slicing cut. This is Ola at work he was really very good at this.

Taking a wide clean cut like this and leaving a near finished surface is not easy but it is clearly shown in many old illustrations like this from  the 15th C. I should say Ola's stance is far safer, hewing accidents are not common but when they occur it is nearly always due to working in the position illustrated below, if the axe catches a glancing blow off the wood it can bounce out into the right shin. I have seen it and it is very nasty.
This is my small board after hewing both sides, this is where you are expected to get to with just the axe. You work right up to but leave the pencil marks showing. Then you can move on to planing.


They had on the worksite the largest collection of Viking replica tools in the world, I'll do another post showing lots of them but they included various replica planes. This was my favourite. You plane first across the grain or at a slight angle then down the grain.


Here's a close up of this lovely plane with it's simple but beautiful horse head decoration.


The final finishing was done with a scraping tool, the original boards showed the medulary rays standing proud and this is what happens when you use this tool again a replica of a 9th century find.

So that gives us a prepared board. Compared to sawing you get less than half the planks from a tree though they are very strong and flexible since you know the fibres run down the length of the plank. Today we would consider it wasteful but in the 9th century large timber trees were plentiful and all heating and cooking in the homes in the area was done on wood so in some ways you could say we were making lots of kindling and firewood and the ship was a by product. More posts to come on steaming and bending and fitting the boards to the ship as well as lots of gorgeous tools.


Monday 14 November 2011

building the world's most iconic viking ship, part 1

HCA's chair Robin Wood visits Norway...

In 1903 a Norwegian farmer dug into a mound in one of his fields and made a discovery which archaeologists rate as comparable in importance to the grave of Tutankhamun. The Oseberg farm is 60 miles south of Oslo outside the town of Tonsberg and for years Oscar Rom had wondered what lay under the mound in his field, people said it was haunted and that it contained graves from the black death. Soon after he started digging he came across some highly carved wood and contacted archaeologists. The whole mound was excavated in 1905/5 revealing the earliest, the most complete and most beautiful Viking ship to survive. The burial mound contained many high status grave goods and the bodies of two women all of which shed  much light on Viking life but for now I want to concentrate on the ship itself.

The ship was preserved and is displayed in the wonderful Viking Ship Museum at Oslo.

On June17th 2010 a new era in the exciting history of this ship began with a project to build an exact replica using the same tools and techniques as were used to build the original. As soon as I heard about the project I knew I had to visit and hopefully work on the ship. An internet friend Tim Allen had been volunteering on the worksite and put me in contact with the New Oseberg Ship Foundation arrangements were made and last week I spent 4 days working on this most remarkable of building sites. My camera cards are bursting with pictures so I'll do a few posts starting with the raw material.

The ship is built entirely of cleft and hewn oak, no saws were used. The trees by modern standards were impressive fat tall and straight grained, a foresters or saw-millers dream. Here are a couple of typical trees for the project with the part built ship in the background. Trees of this quality have proved impossible to source in Norway so most of the planking trees have come from Denmark. The oak for the keel, the backbone of the ship was however felled locally.


This is Thomas Finderup who built the 4 large replica viking ships at the famous Roskilde viking ship museum in Denmark. Nobody alive knows more about Viking shipbuilding or tools.

The trees are split with hammers and wedges, first in half then quarters, eighths and finally sixteenths, the last is the hardest split to get to run true. Whenever you split wood if you get exactly even amounts of wood either side of your slit it is more likely to run true and straight, get it wrong and the split will "run out" leaving you with one heavy thick chunk and one too thin to use. The important thing is to get as wide a plank as possible by avoiding the split running out as it heads toward the thin centre. To do this the shipwrights start by cleaning a 2" wide flat at the centre of the tree scoring a centre line down this with a chisel and then inserting small wooden wedges. Only then do they start opening up the split with metal wedges knocked in from the end, this is Gregorius.


And once they are happy they let visitors who's skill level they are not yet sure about have a go :0)


This split started to run off on the underside so we started again from the far end, this time it ran true. It was worth taking the time as the original tree was nearly £1000 and would yield just 16 of the widest planks.

once the split is going well you can use a bit more force, Tim with the big mell.

The thick wedge this produces is then hewn down to a single plank with a axe, planed, steamed, fitted and finally riveted into place with iron boat nails. More on that in the following posts. I'll also post about the organisation and running of the project and the gorgeous replica axes and other tools. Cleaving timber for ships like this died out, Thomas told me, in the 1200s, we can clearly see that the timbers of earlier ships were cleft and later they were sawn but the art of cleaving wide long boards for shipbuilding was completely lost for 800 years. Thomas and the team from Roskilde developed their way of working but no-one really knows exactly how the Vikings did it.

more old woodworking films

first a nice new one about rakemakers the Rudd family in Cumbria.


16 TEETH - Cumbria's last traditional rakemakers from Rii Schroer on Vimeo.

and some old ones about sussex trug making, first in colour from 1963


TRUGS


and then back to 1929

BASKET MEN OF SUSSEX


and finally Irish coracle making, nice shots at the end of using them for fishing.

A BYGONE CRAFT

Thursday 3 November 2011

major crafts research goes ahead

A major new research project promisses to shed light on the UK traditional craft sector for the first time.

When we started the Heritage Crafts Association 2 1/2 years ago one of our first objectives was to properly map the sector, to find out which crafts were endangered, which were doing well and which offered potential for growth. In fact it was the first objective in my wish list back in Jan 2009.  We were told that to do this job properly would cost between £50,000 and £100,000 not the sort of money we had handy as a new charity.

After 2 years of gentle advocacy we were delighted when Skills Minister John Hayes announced that he would find funds for just the research we had been asking for.  HCA were part of the interview panel and we are delighted that Trends Business Research Ltd have now been appointed to undertake this major project. The final report is due to be completed by next March and a whole lot of work has to be completed by then, creating a database of as many practicing craftspeople as possible will be key and we hope HCA friends and followers will be able to help us spread t=he word when the time comes.


What good will it do?


Well we have lots of anecdotal evidence that there are certain issues within our sector. eg elderly skilled craftspeople not able to pass on their skills to a following generation, lack of entry routes for young people to start in a career etc.


The stories we have collected have been enough to convince many people there is a real problem but in order to access funding to address the issues we need more proof of the size and nature of the situation, genuine research will also help us see clearly where the most pressing issues are and prioritise action. It will also be great to help publicise the fantastic work that does go on within the traditional craft sector which has often played second fiddle to the better funded innovative contemporary crafts.